Looks good, 2 questions.
1 st. does the base on one end look thinner then the other, and did it peel during printing.
2 nd do you always get the little bit of flashing around the bases attaching to the build plate?
I I like the thinner build spru. Am jealous, your getting great results, when i grow up i wanna be like you.
Keep the pictures coming, inspiring..
Toddmichael
***Totally Stoked!!***
-
toddmichael

- Novice
- Posts:77
- Joined:Sun Jul 05, 2015 4:33 am
- Location:Motor City, Mi
Toddmichael
Firestorm Cad / Jeweler / Designer
Firestorm Cad / Jeweler / Designer

Re: ***Totally Stoked!!***
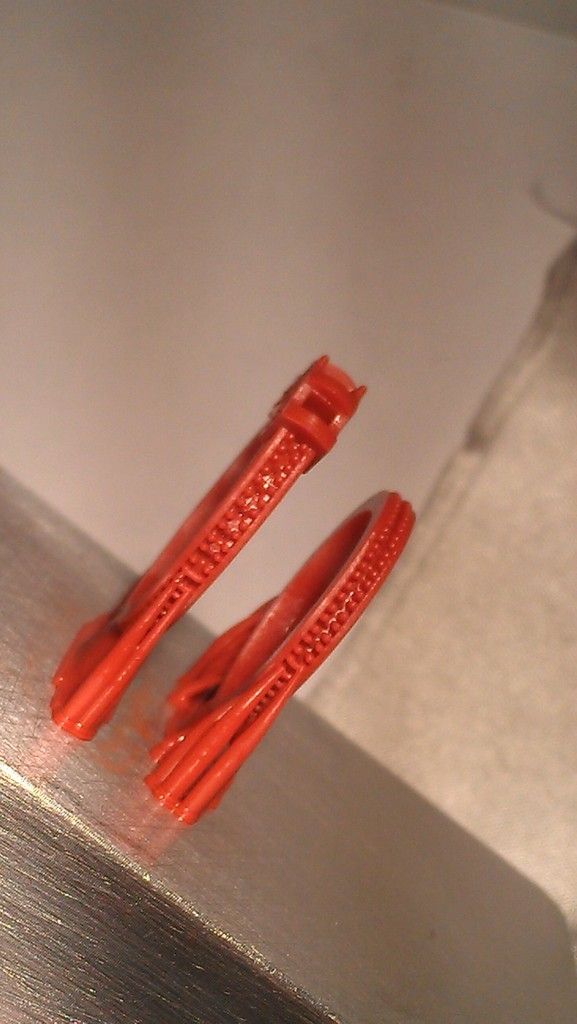
toddmichael wrote:Looks good, 2 questions.
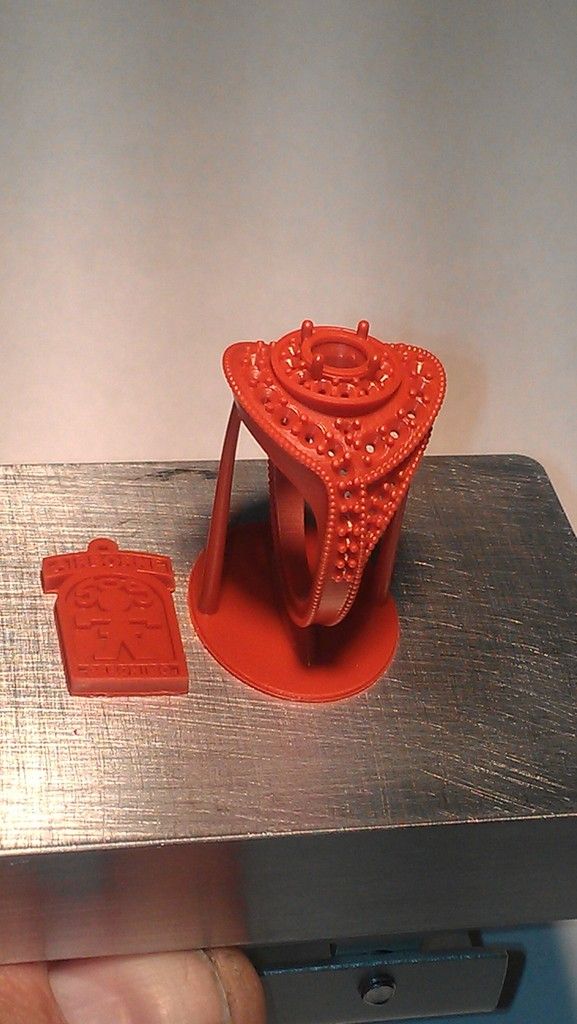
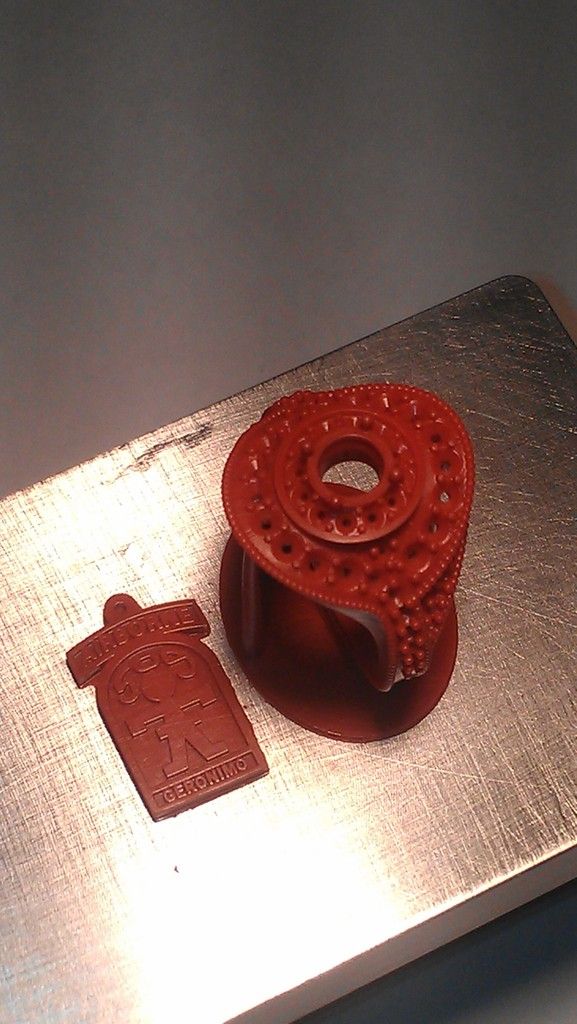
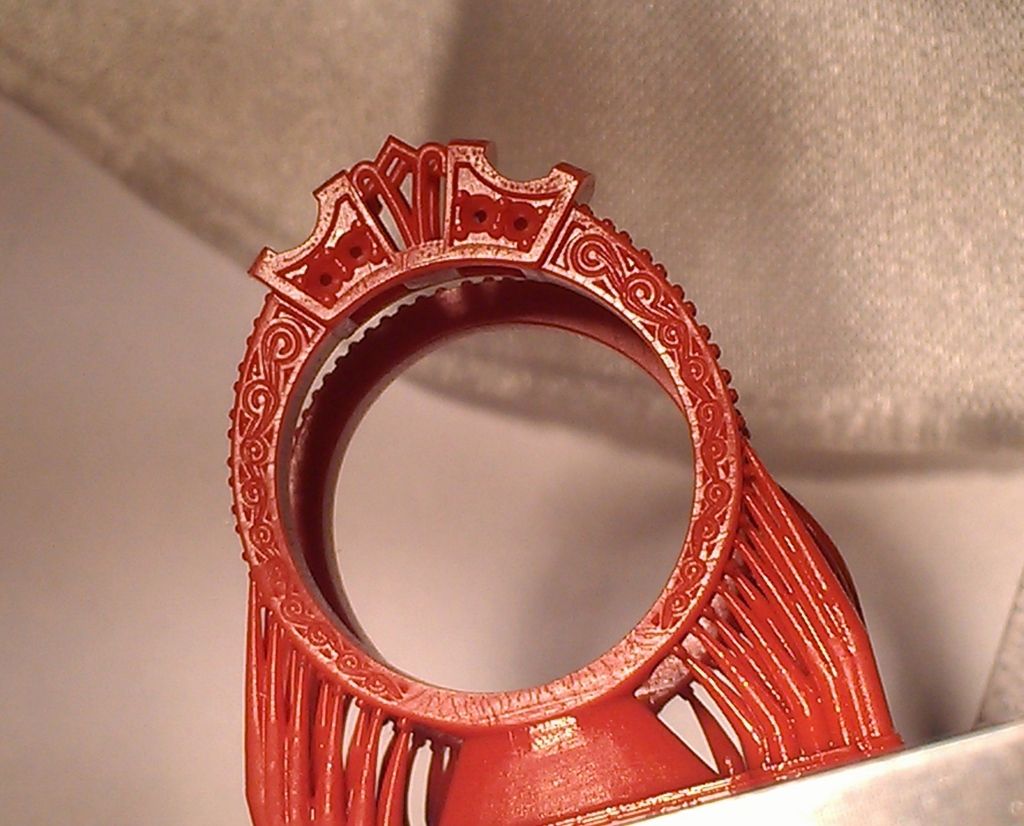
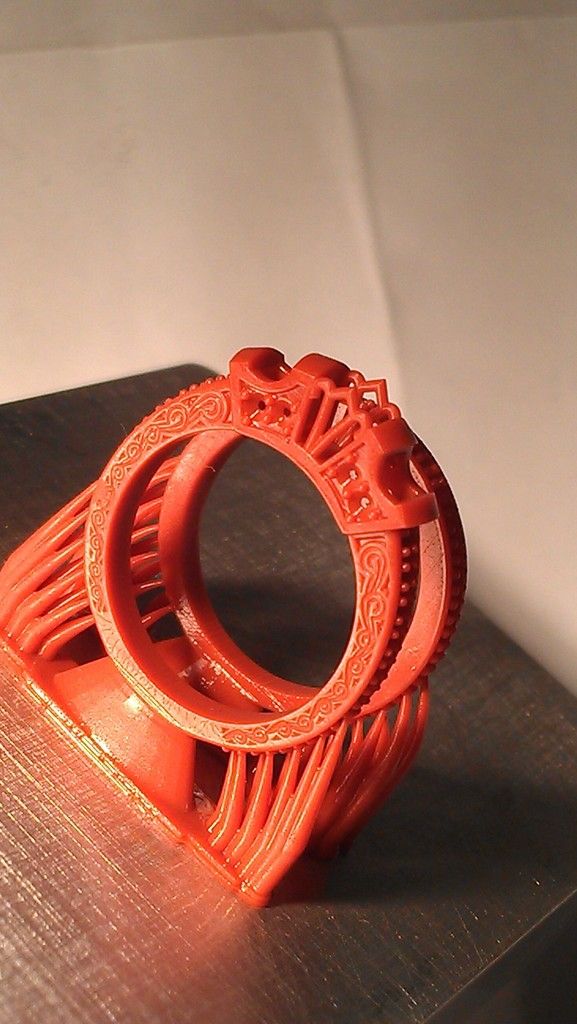
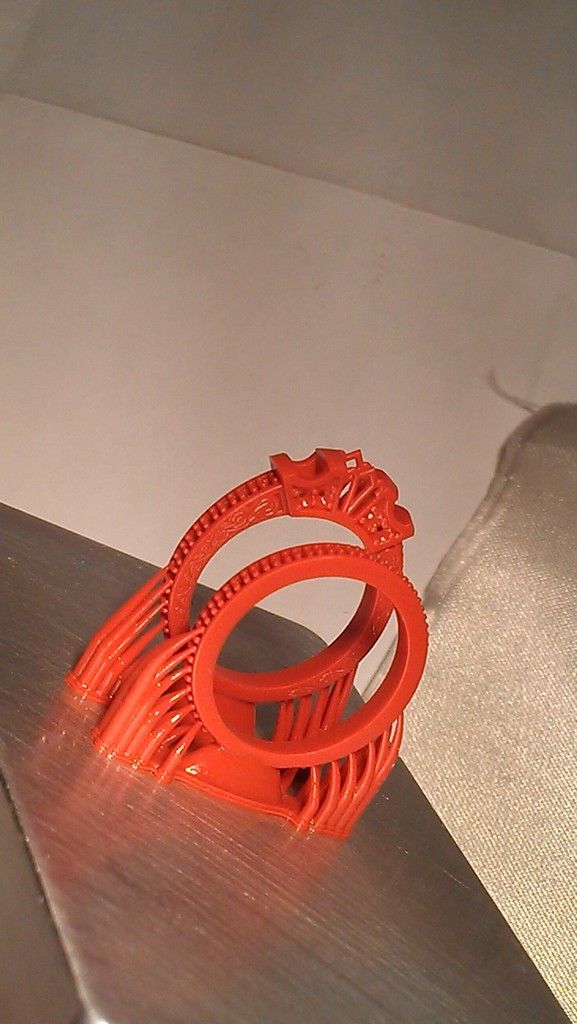
1 st. does the base on one end look thinner then the other, and did it peel during printing.Ha I was wondering if anyone would catch that!! That is called not removing the Shutter fast enough when the print started!!! I just let it print till I could see the pieces. Once I knew they were printing fine I just let it continue to print.
2 nd do you always get the little bit of flashing around the bases attaching to the build plate? The pics of the plates still have resin around the bases . No flashing around the bases except when you don't remove the shutter fast enough before printing!!! I fixed that. I put a long tab on the shutter to remind me!!
I I like the thinner build spru. Am jealous, your getting great results, when i grow up i wanna be like you.
Keep the pictures coming, inspiring..
Toddmichael

Re: ***Totally Stoked!!***
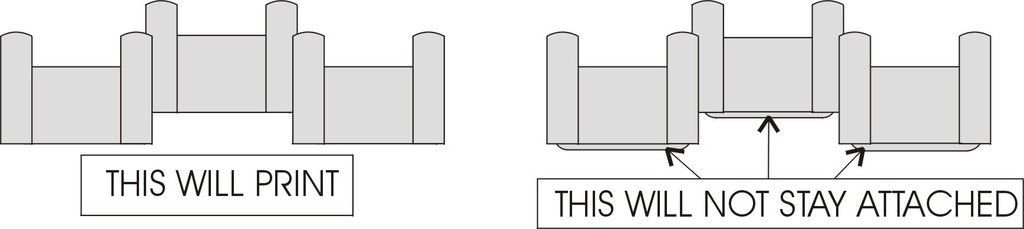
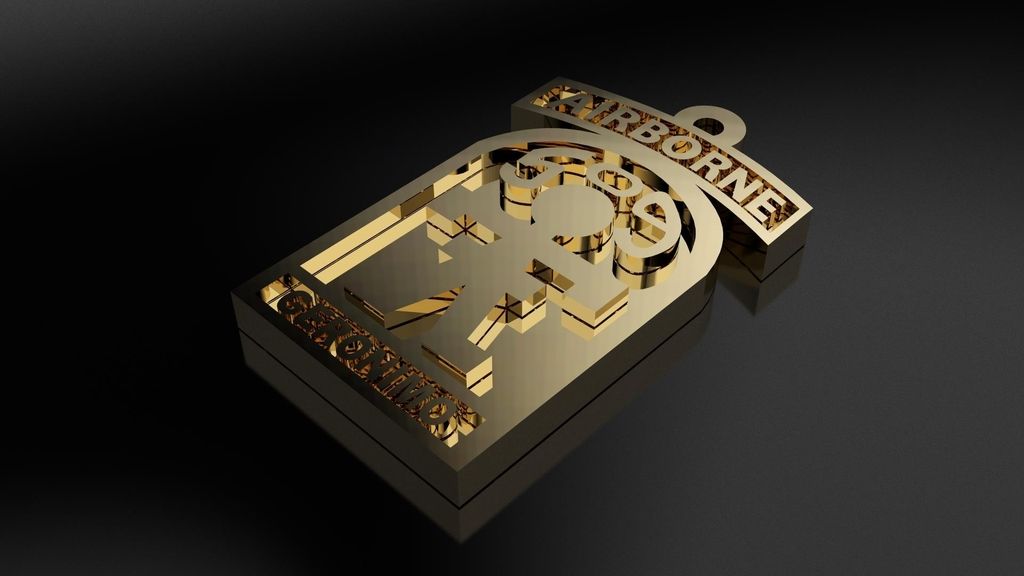
The first week has been a learning curve for me. I am used to designing for a CNC which is more forgiving than the printer. For example: When I designed a head for a cluster style ring in the past the prongs didn't have to run all the way down to the base of the head. The CNC pieces don't need that type of support. For the printer every piece of a part that doesn't connect to another part somehow or over hangs must have a support or it wont grow correctly. But on a cluster for example that has 41 stones you cannot put a support for every head base. So I have to think a little differently when I design a piece now. I will post up a drawing example later.
Re: ***Totally Stoked!!***
Just a simple sample below. I have found that something this simple can mess up a print.

-
mongerdesigns

- Solus Guru
- Posts:1950
- Joined:Sat Apr 25, 2015 5:16 pm
- Location:Los Angeles
- Contact:
Re: ***Totally Stoked!!***
Very nice example, Mark.
Monger Designs a.k.a. Monger
http://www.mongerdesigns.com
Junction3d - Official US Distributor for the SOLUS 3D PRINTER
http://www.junction3d.com
Follow us on Instagram!
https://www.instagram.com/junction3d/
http://www.mongerdesigns.com
Junction3d - Official US Distributor for the SOLUS 3D PRINTER
http://www.junction3d.com
Follow us on Instagram!
https://www.instagram.com/junction3d/
A few More from Today!!
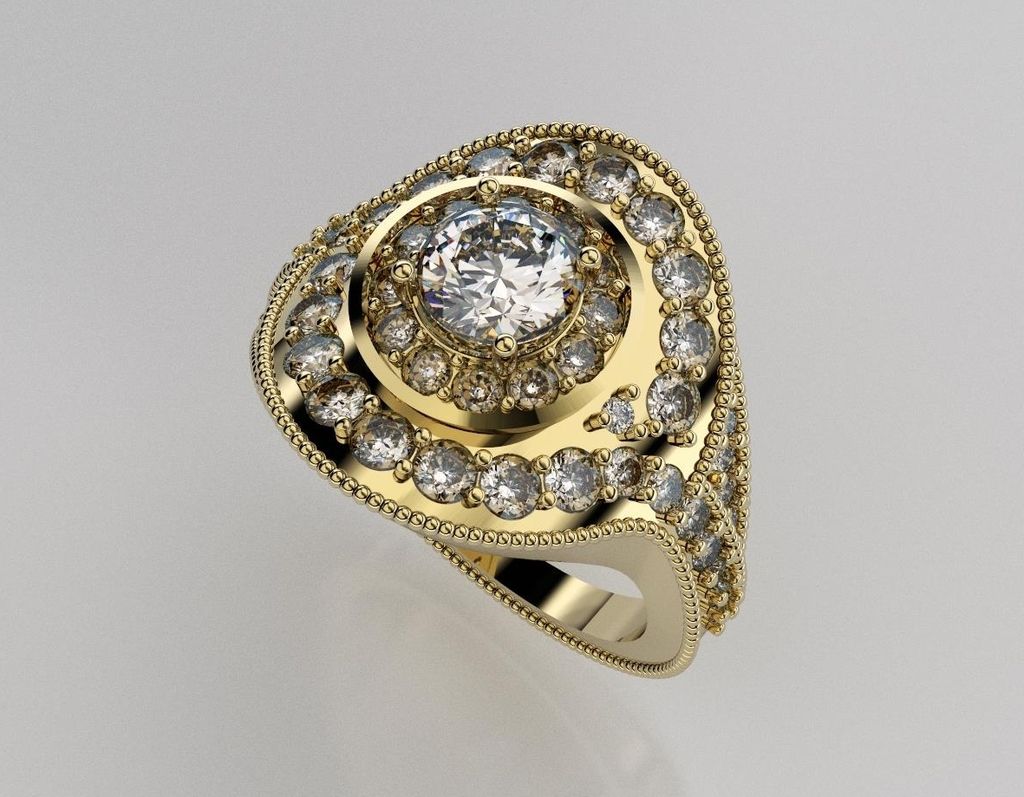
I thought I would post up a few more for everyone. Very very smooth surface on these. I did the models and STLs on RhinoGold. There is a huge difference in quality between the lowest quality STL and the High quality setting. I haven't tried the Very High Quality setting on the STL module.


Re: A few More from Today!!
Archerm wrote:I thought I would post up a few more for everyone. Very very smooth surface on these. I did the models and STLs on RhinoGold. There is a huge difference in quality between the lowest quality STL and the High quality setting. I haven't tried the Very High Quality setting on the STL module.
mind sharing how you supported the mill grain beads?
Re: A few More from Today!!
Actually there is no supports on them at all just a base support and two top supports as in the photo . It is all in the modeling I just made sure the millgrain beads were deep enough in the piece and set the millgrain bead overlap to .10mm, that way they support each other.
KBS756 wrote:
mind sharing how you supported the mill grain beads?
Re: ***Totally Stoked!!***

Re: ***Totally Stoked!!***
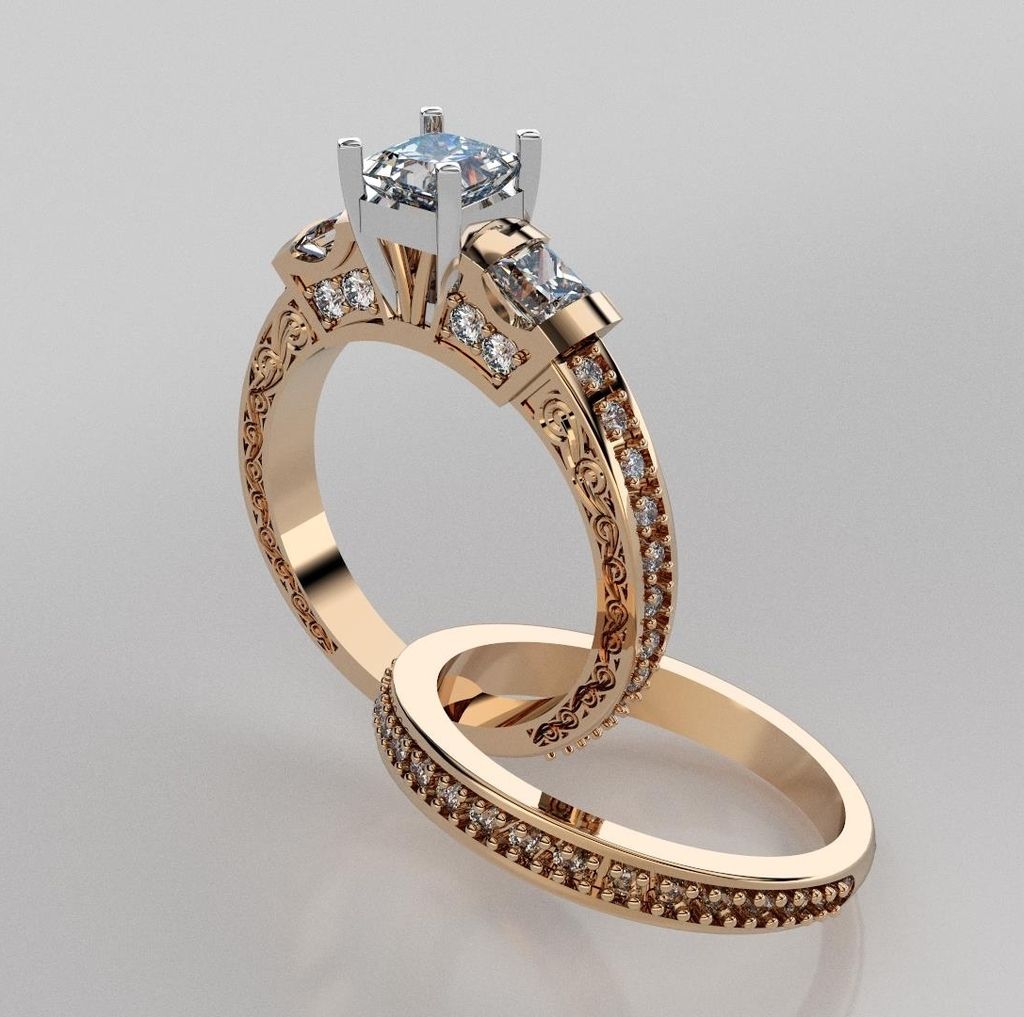
Well I thought I could out do this printer!! Not. I had a emergency job for Christmas and spent a bunch of time on the cad work for this ring. I even put some engraving on the side of the engagement ring. These pics still had some moisture on them and the pics don't do them justice. Every detail is clean and sharp just like the others. Mark


Who is online
Users browsing this forum: No registered users and 6 guests