I don't know how many of y'all frequent the B9 forum, but it is a great resource.
I thought i'd share what i found about curing.
These guys say UV cure for 30min (i'd do longer), and then 30min at 200*F in the oven.
The extra cook in the oven is to evaporate off any uncured resin. I haven't tried it yet, but it has supposedly helped several achieve 100% burnout success.
Post Curing
Re: Post Curing
I post this not so much to share, but to find out what is working for y'all.
-
Jewelermdt

- Solus Master
- Posts:809
- Joined:Sun Jul 19, 2015 10:38 pm
- Location:N.W. Florida
- Contact:
Re: Post Curing
I'm using the Emerald green. I only cook mine in the microwave in baby oil. (depends on MV watts, mine is a strong 700 watt) Holds heat longer than water and doesn't boil out like water. I do it 3 minuets, let cool at least 10 or till cool to touch. I do this three times. This is for light models. I have not had a heavy job yet. A lot quicker than UV and oven.
Re: Post Curing
Is baby oil better than glycerin?
-
Jewelermdt
- Solus Master
- Posts:809
- Joined:Sun Jul 19, 2015 10:38 pm
- Location:N.W. Florida
- Contact:
Re: Post Curing
I have only used baby oil. I would stay away from Glycerol as it's more of an alcohol. Which I read is not great for resin.
Re: Post Curing
Post cure? For what purpose? I've never used the microwave or mineral oil techniques you guys have mentioned, I may have to try it. What is the advantage?
This is what I do.
1. Rinse with alcohol
2. 6-12 minutes in the ultrasonic cleaner
3. Another quick rinse in alcohol
4. Submerge parts in hot water. I use a mason jar. Sometimes I suspend the parts with fishing line.
5. Place jar, water, & submerged parts in one of these for 10 - 20 minutes. http://www.instructables.com/id/Make-a-VU-LED-Oven-for-curing-DLP-Resin-3D-prints/
Using this method my parts are free of any residue & appear to be fully cured.


Re: Post Curing
Argyle I made and use the same uv light box.
I have been casting a lot of resin pieces over the past few months. The number one thing that makes a great cast is the curing. I dont think it matters how you cure the resin models just that they are cured all the way trough. I UV cure over night to get the skin cured well then I microwave in Distilled water for 2:30 minutes coll then repeat two more times.
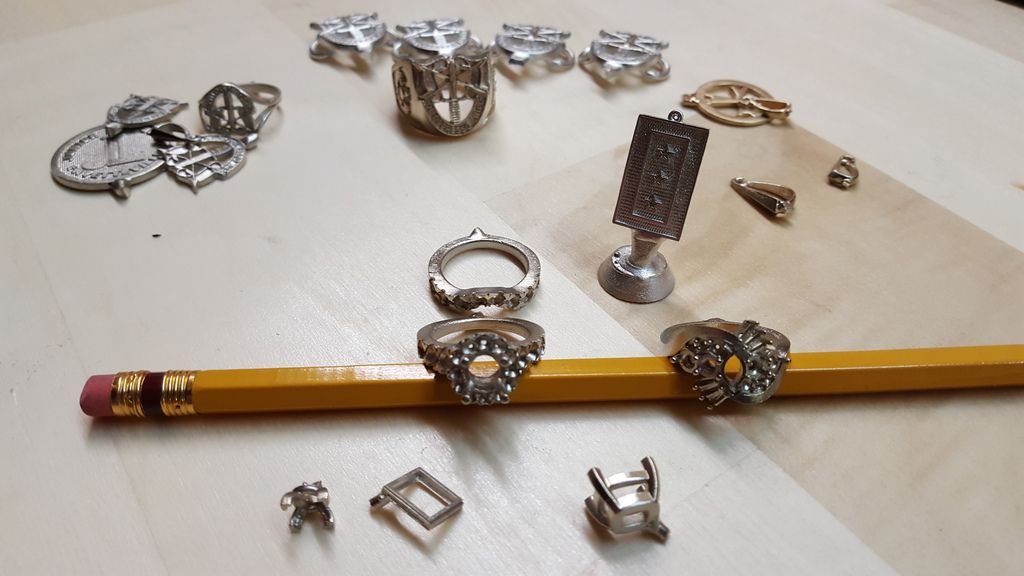
I have had 100% good results with Plasticast since I switched to Plasticast. I have changed my burnout schedule. I ramp up to 0-800* in the first three hours hold for 1 hour. I then go straight to 1400* this takes about 2 -3 hours depending on how much volume is in the oven Hold for 1 hour then back down to optimum metal casting temperature.
Castings from yesterday. The front 7 are resin models.
I have been casting a lot of resin pieces over the past few months. The number one thing that makes a great cast is the curing. I dont think it matters how you cure the resin models just that they are cured all the way trough. I UV cure over night to get the skin cured well then I microwave in Distilled water for 2:30 minutes coll then repeat two more times.
I have had 100% good results with Plasticast since I switched to Plasticast. I have changed my burnout schedule. I ramp up to 0-800* in the first three hours hold for 1 hour. I then go straight to 1400* this takes about 2 -3 hours depending on how much volume is in the oven Hold for 1 hour then back down to optimum metal casting temperature.
Castings from yesterday. The front 7 are resin models.

Last edited by Archerm on Fri Apr 22, 2016 6:26 pm, edited 1 time in total.
Re: Post Curing
One more thing. I feel that letting the resin bake in the investment at the lower temps promotes investment breakdown. The faster you can get the resin to its flashing point the investment Doesn't have the chance to damage the mold cavity in the investment. Ramping up a little faster is a game changer with Plasticast. I did a super rush job with Plasticast and the emerald the other day and the casting came out perfect. I did a 4 hour burnout and cast. Almost ramping the temp straight to 1400*. So it can be done. The only caveat would be to take it just a little slower temp ramp up with heavier models those being 15gms of metal or more. Expansion of the resins might be a issue .
-
mongerdesigns

- Solus Guru
- Posts:1950
- Joined:Sat Apr 25, 2015 5:16 pm
- Location:Los Angeles
- Contact:
Re: Post Curing
That's interesting info Mark. I've heard that about the fast burnout before too. For some reason sometimes faster burnout works better with these types of resins.
Monger Designs a.k.a. Monger
http://www.mongerdesigns.com
Junction3d - Official US Distributor for the SOLUS 3D PRINTER
http://www.junction3d.com
Follow us on Instagram!
https://www.instagram.com/junction3d/
http://www.mongerdesigns.com
Junction3d - Official US Distributor for the SOLUS 3D PRINTER
http://www.junction3d.com
Follow us on Instagram!
https://www.instagram.com/junction3d/
-
M-Williams

- Solus Master
- Posts:393
- Joined:Sun Nov 01, 2015 4:45 pm
Re: Post Curing
Since I UV cure my prints in the Water. I cut my curing time to 2 hours and I assume this step is primordial to a successful casting.
Who is online
Users browsing this forum: No registered users and 73 guests